Computer Memory Upgrade
Your guide to computer memory upgrades,
RAM buying guide, and guide to install compatible RAM.

Table of Contents

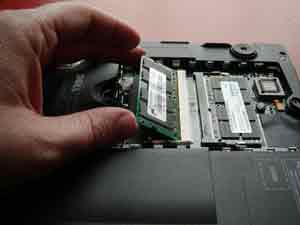
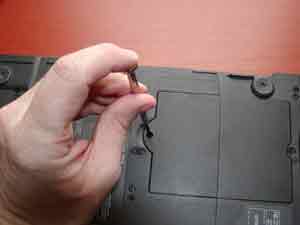
Installing Laptop Memory
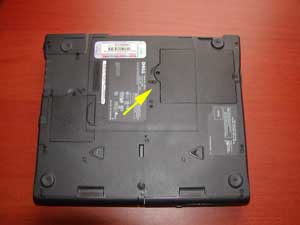
Difficulty: Relatively simple
Time Required: 10-15 minutes
Tools Required: Precision Philips or flat-head screwdriver
 

This guide was developed to instruct readers on the proper procedures for installing memory modules into a laptop computer. It includes step-by-step instructions for the physical installation of a memory module into those laptop systems that have an access panel to the memory modules. Not all laptops have this type of access. If yours does not, then it will probably require installation from an authorized technician.

For additional information about installing computer memory into your computer system, it is recommended that you read any user manuals that came with your computer for specific procedures that may be required. For more information for purchasing memory upgrades for a computer, please refer to the Before You Buy Memory upgrades article.

  1. Turn off the computer and remove all power cords from the computer system.
  2. Locate the panel used for access to the memory modules. This is generally located on the bottom of the laptop computer. Refer to your laptop instruction manuals for locating the panel.
  3. Remove any screws that the panel in place and place somewhere safe to prevent losing it.
  4. Remove the panel from the laptop and set aside.
  5. If replacing or upgrading an existing memory module, remove the memory modules by undoing and module clamps and gently lifting the edge of the module to a 45-degree angle and then pulling the module out of the slot.

  6. Align the notch of the memory module with that of the memory slot and gently insert the module into the slot at a 45-degree angle.
  7. Once all the pins are in the slot, gently rotate the module down flat until the clamps lock into the module into place.
  8. Replace the memory access panel onto the laptop computer.
  9. Replace any screws or fasteners that hold the panel in place.
  10. Replace the power cord and power up your computer system.

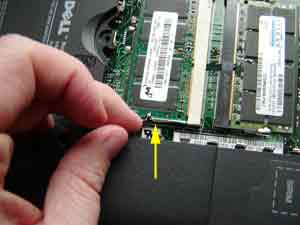
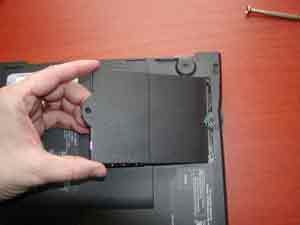
Once the memory has been installed into the computer, the physical process is complete. When the computer is powered back up, it may be necessary to go into the computer BIOS to let the system properly detect the new RAM that has been installed in the computer. Please refer to the user manual for the computer system for any additional information.


Laptop Memory - Specification Analysis


Samsung
Kingston
Viking Components
PNY Technologies


Cisco Systems
Compaq
Apple
HP
Dell
IBM
Packard Bell

RAM vs Hard Drive

RAM Is More Important Than Chip Speed

RAM: Mac OS X needs more than you (probably) have

DDR-II, Facts and Fiction

High Performance DDR DIMMs

DDR Essentials, the rise of a new platform

Modding the Mushkin, the birth of Rev.3

Inside the EDDR chip

150 MHz Dimms at CAS-2

Micron versus Rambus

Bandwidth vs. Latency

Corsair PC-100 256MB unbuffered DIMMs

Corsair PC133

HSDRAM, new DIMMs from Enhanced Memory Sytems

ESDRAM Preview

DIMMs and DIMMs

Memory FAQs

DIMM FAQs

DIMM Performance Comparison Chart

RAM Requirements for Graphics

Bad Memory Article

Dell - Learn More - Memory Modules

Dell - How do you install memory?

Upgrading Your Memory

Installing DIMM Memory Module - Install DIMMS

Installing a SIMM Memory Module

Installing Rambus® RIMM Memory Modules

Installing SODIMM in your Laptop

Printer Memory

Benefits of installing more RAM into the printer?

Installing a Flash DIMM in the Hewlett Packard Laserjet 8000/9000 series

How to / Installing and Removing Options

Memory Upgrade Information for Apple Laserwriter printers

PRINTER MEMORY INSTALLATION GUIDE

support@computermemoryupgrade.net

© 2003  Computer Memory Upgrade